Update PCB from schematic
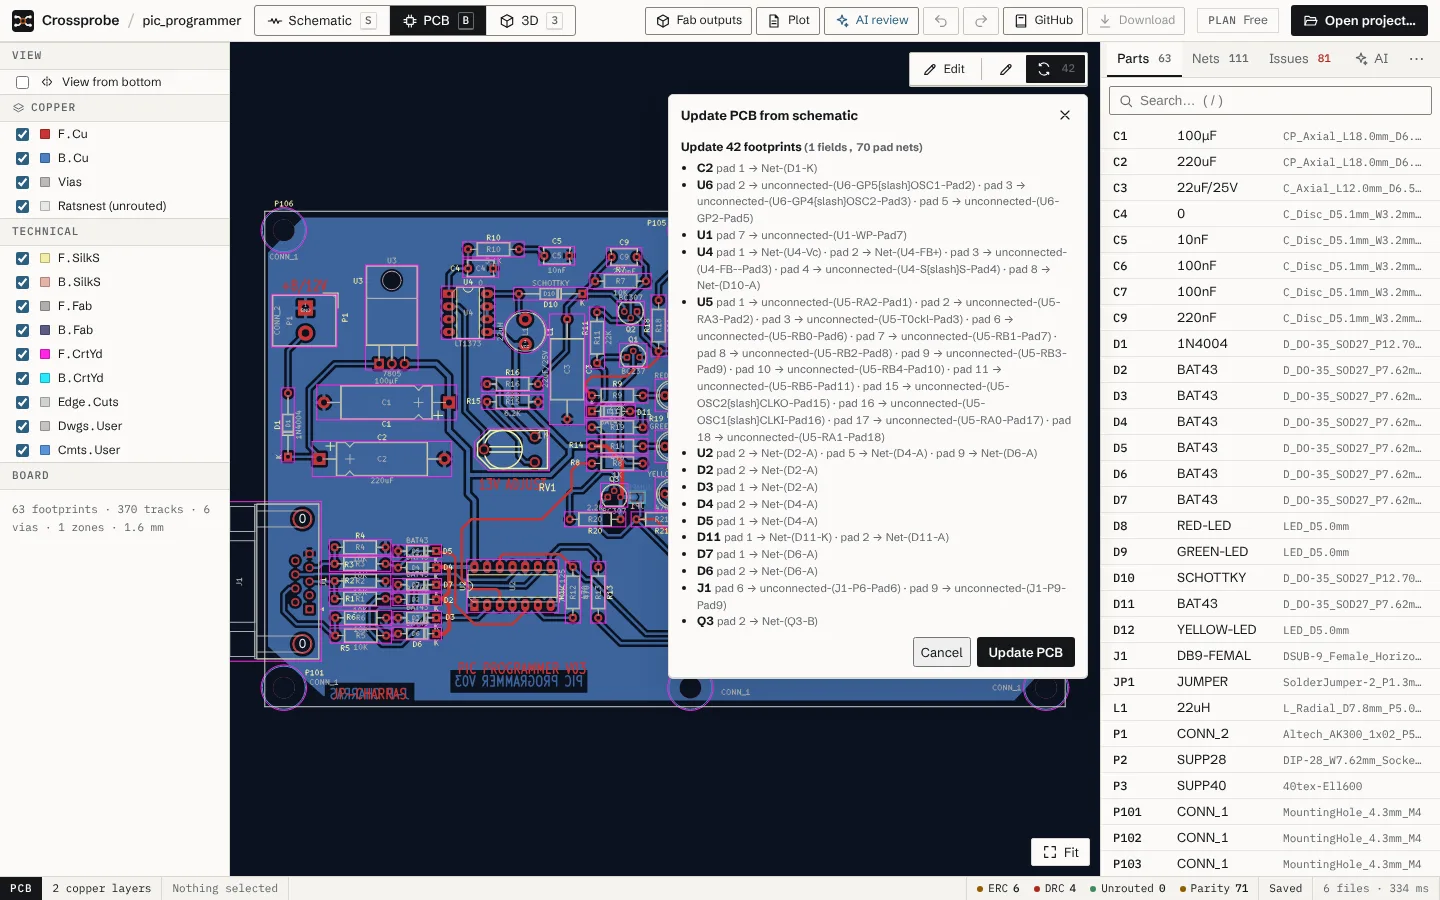
F8 compares the board with the schematic and shows what it would change before it changes anything. Footprints are matched to symbols the way KiCad matches them.
Run it
- Press F8, or choose Update PCB in the PCB view's toolbar. A count on the button shows how many footprints there are to update or add. F8 works from any view and switches to the PCB.
- Read the Update PCB from schematic panel. If there is nothing to do, it says "The board matches the schematic."
- Choose Update PCB to apply it, or Cancel.
The update is one edit, so one undo reverts all of it.
What it changes
The panel lists the changes in up to three groups:
- Update footprints: each footprint whose fields or pad nets differ from its symbol, with the changes: references, values, other fields, and the net of each pad.
- Add footprints: symbols that have no footprint on the board yet. Their footprints come from KiCad's footprint libraries and are lined up beside the board, packed by their courtyards, ready to place.
- Footprints without a symbol: footprints on the board that no symbol matches. They are kept unless you tick Delete them.
Footprints are matched to symbols by symbol path first, then by reference, as KiCad does.
Parts without a footprint
A new part needs a footprint before Update PCB can place it. If some have none, the panel says how many and offers Assign footprints…, which opens the table of all parts with a chooser for each. See fields and footprints.
If a part's footprint isn't in the installed libraries, the update tells you which references it skipped. Set their Footprint field in the schematic and run it again.
Check that the board is in sync
Differences between the schematic and the board are listed in the Issues tab under Board ↔ schematic, and the list updates after every edit. After an update, it has nothing left to report for the parts you changed.
A typical round trip on an existing project:
- Change a part's value in the schematic.
- Press F8 and choose Update PCB.
- Refill the zones with B.
- Save with ⌘S.
On KiCad's own pic_programmer demo, this leaves the schematic different from the original by exactly the one changed line, and KiCad reports the board in sync with the schematic.
Next: place the new footprints and route them. See PCB editing and Routing.